The Installation process is the same for most of the flooring, but Each flooring type is installed in a slightly different way.
#3 Steps for Floating Floors Installation
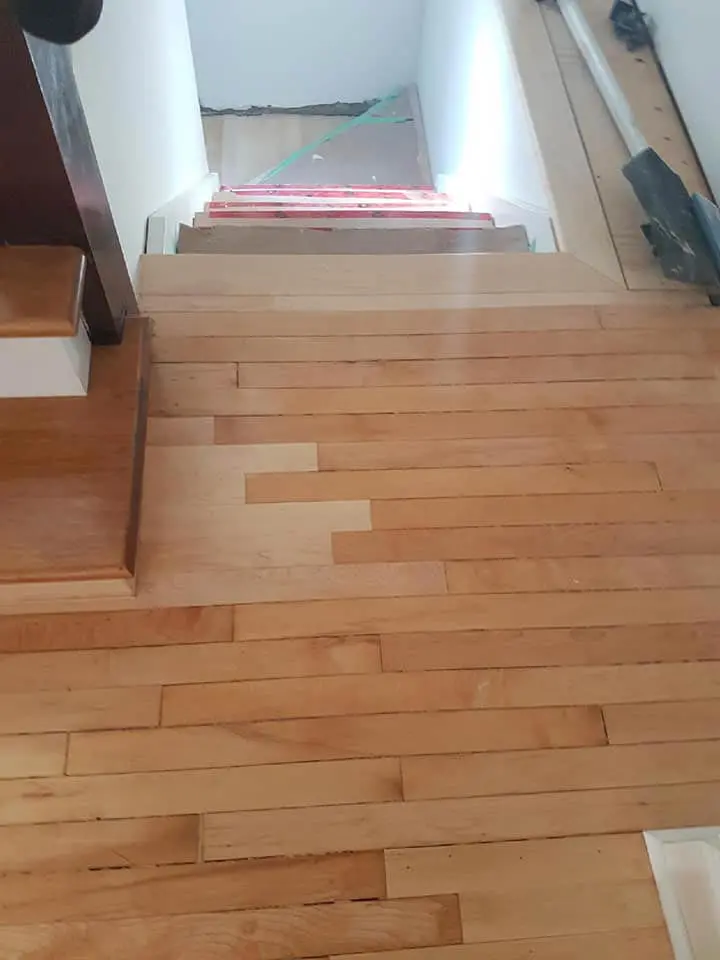
Step 1. Prepare the subfloor for the new flooring

A quality installation begins with proper sub-floor preparation. It’s during this step that you’ll also want to trim the casings of door frames to make room for the following to slide underneath.
Each installation area should be independently checked, and you should never assume that because one room is flat and level that all rooms are the same.
It also doesn’t matter if your sub-floor is concrete or plywood. When installing floating floors, including laminate, engineered and click together vinyl plank, the sub-floor should be solid, flat, dry, clean and squeak free.
High spots in a concrete sub-floor can be reduced with a concrete grinder and wood sub-floors can be fixed by sanding or planning the area to the desired height.
A large hump in a plywood sub-floor, may be necessary to remove the plywood in order to shave down the joist(s) and then re-install the plywood.
Low spots or dips in the sub-floor can be fixed with an approved levelling compound. Once dried, the area can be sanded further to the meet the level of flatness required for the product being installed.
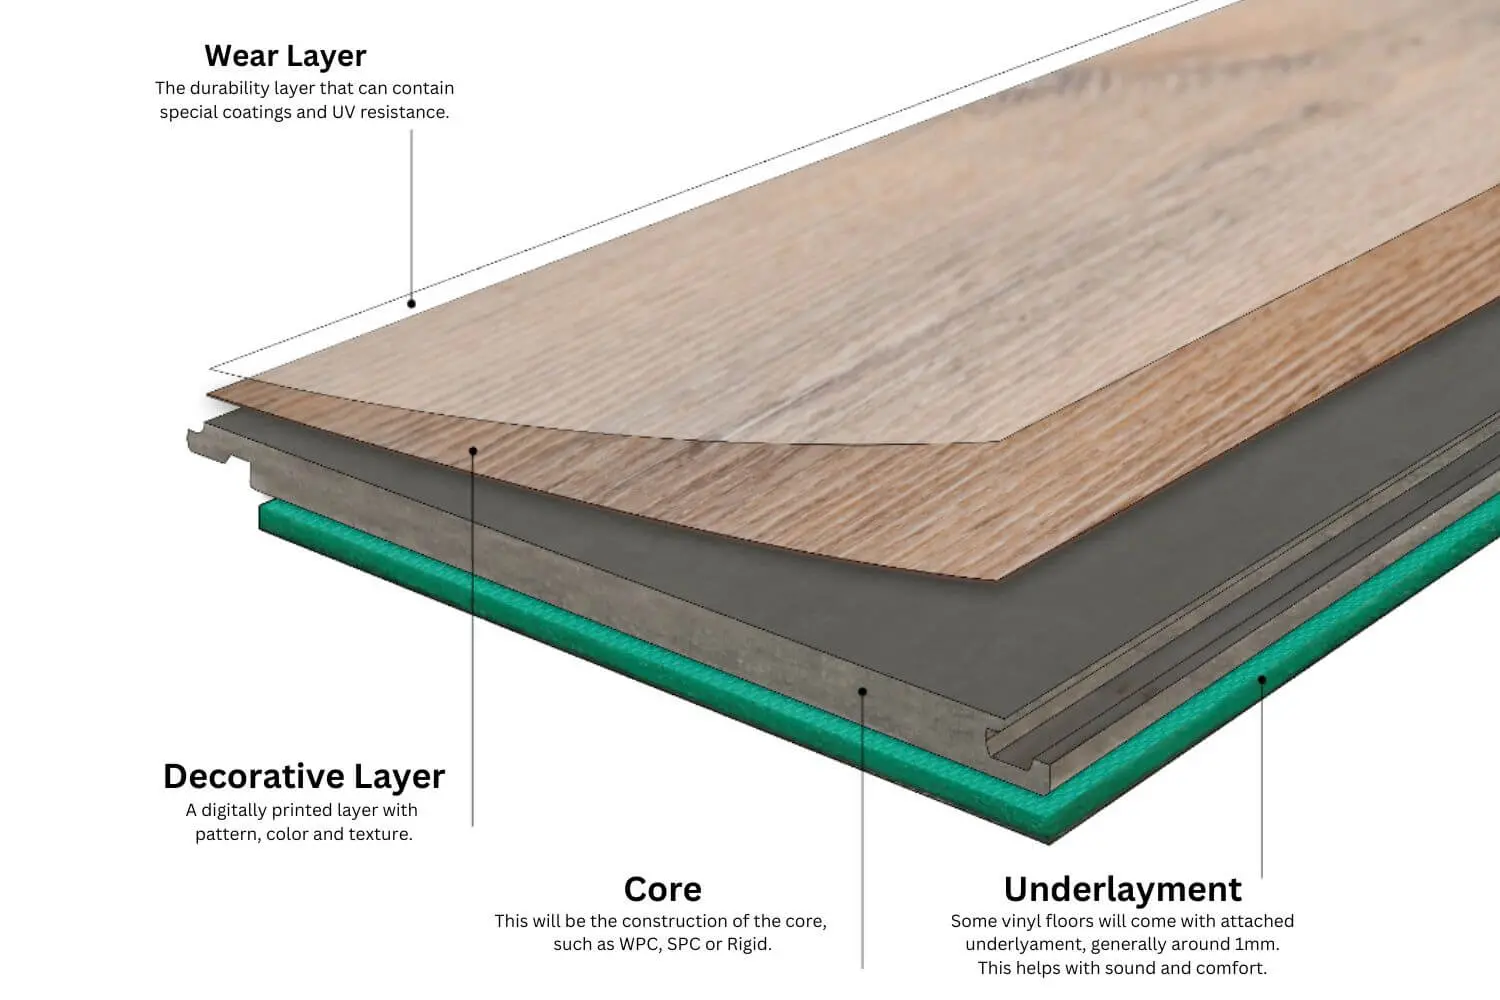
Step 2. Install the underlayment
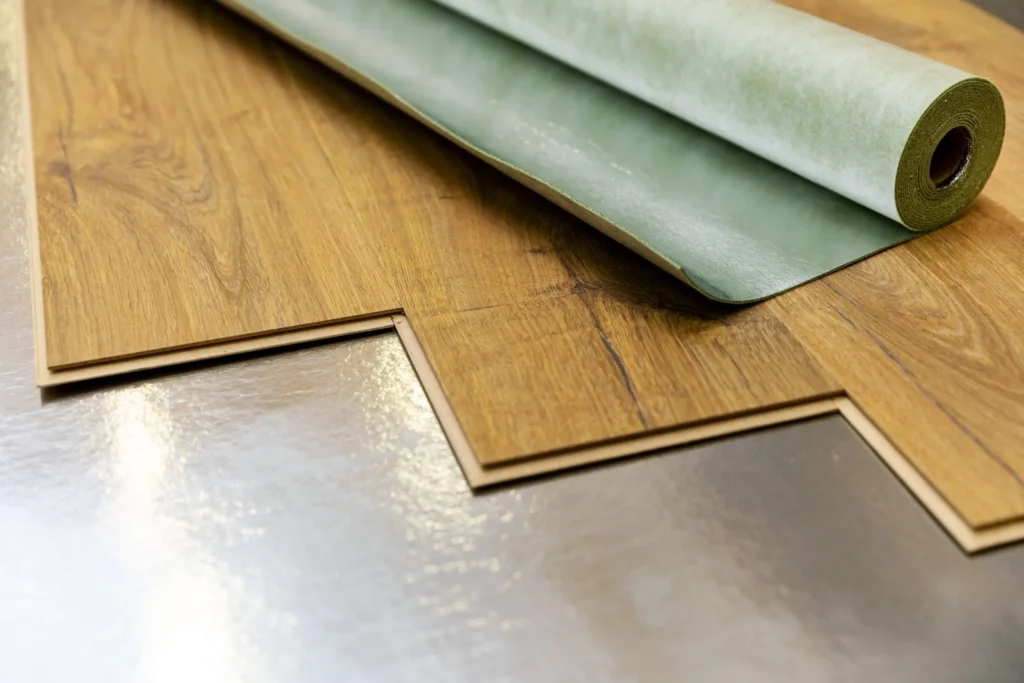
Underlayment help absorb sounds and make the finished flooring more comfortable underfoot.
Some floating floors come with a pad underlayment already attached and you can install it directly over the concrete subfloor.
If you don’t have a pad attached, then consider using a 1mm or less foam pad to help the floor float properly.
A thin layer of underlayment is rolled out over strips until you’ve covered the entire sub-floor, cut it with a utility knife to fit cutting around any corners or obstacles. Tack it into the subfloor and then seal the seams together with duct tape It’s important not to layer the overlay, but have the seams flush.
Step 3. Install the flooring
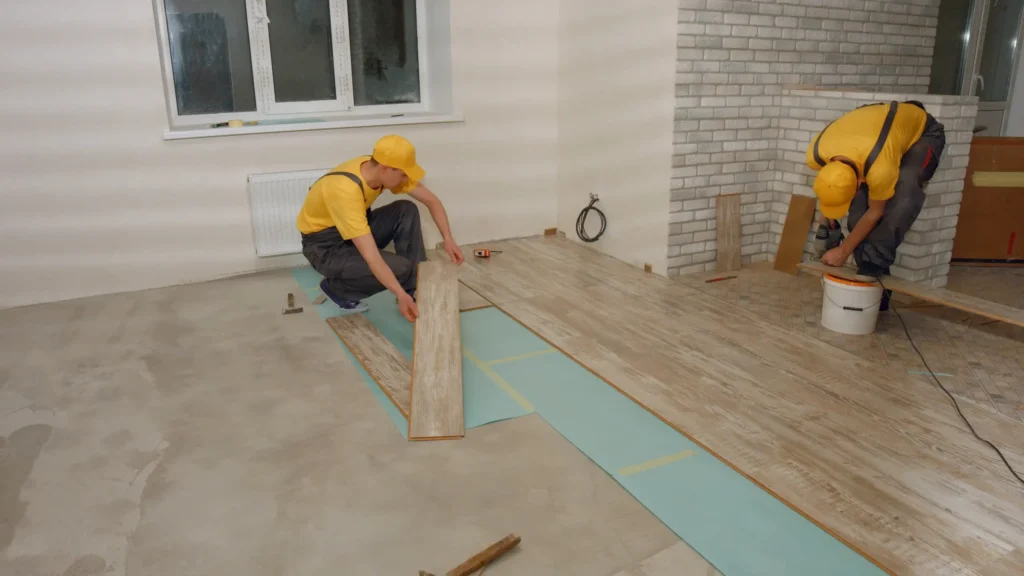
It’s common to install floating flooring with a small gap between the material and the walls to make space for expansion and contraction due to humidity and temperature changes.
First you need to place a 5/16-inch spacer against the wall, creating this space will help the prevent cracking when the floor expands, and help the floating floor moves as a unit with temperature fluctuations.
Lay out the first piece of flooring with the groove side against the wall so it fits snugly against the spacer. Place the next piece end to end and snap the two tongue-and-groove pieces of flooring together. Continue this process on the floor along the wall.
Cut the last piece of flooring with a jigsaw or circular saw so it will fit, leaving a small buffer between it and any walls (for expansion or contraction).
Place the next row and stagger the joints so that they overlap. Cut the first piece of flooring of your next row so that the end-joints don’t fall along the same plane.
Continue staggering each new row until you’ve covered the room with the flooring, remove the spacers from the edges of the walls. Cover up the free space between along the wall with baseboard or shoe molding.

FAQ-
1. How is a floating floor installed?
A floating floor is installed by locking or snapping the planks together over an underlayment, without using nails or glue to attach them to the subfloor.
2. How to construct a floating floor?
To construct a floating floor, first prepare a clean and level surface, lay down underlayment, and then connect each plank or tile using the click-lock method.
3. What holds a floating floor in place?
Floating floors stay in place through their interlocking system and the weight of the flooring itself, along with baseboards that secure the edges.
4. What are the disadvantages of floating floors?
They can be prone to moisture damage, may feel slightly hollow underfoot, and typically don’t last as long as traditional hardwood floors.
5. Do you need to put anything under a floating floor?
Yes, an underlayment is usually needed to reduce noise, provide cushioning, and act as a moisture barrier.
6. What is the best material for floating floors?
Luxury vinyl planks, laminate, and engineered wood are the most popular and durable materials for floating floors.
7. Can you put floating floors on concrete?
Yes, floating floors can be installed over concrete as long as the surface is dry, smooth, and covered with a proper moisture barrier.
8. What is the easiest floating floor to install?
Laminate and vinyl click-lock floors are the easiest options to install, making them great choices for DIY homeowners.